Calligraphy is more than just beautiful writing—it’s an ancient art form that marries precision with creativity. From historical manuscripts to modern wedding invitations, calligraphy has always captured our fascination with its elegance and style. Whether you’re an aspiring artist, a hobbyist, or simply someone who appreciates the beauty of the written word, this guide will provide you with essential tips and techniques to elevate your calligraphy practice.
Note: Affiliate links may be used in this page. I may receive a small commission at no extra cost to you if you use my affiliate link. Full disclosure policy here.

Understanding the Basics of Calligraphy
Before diving into the more intricate details, it’s important to grasp the fundamentals of calligraphy. Calligraphy comes from the Greek words “kallos” meaning beauty, and “graphein” meaning to write. It’s an art that has evolved over centuries, with different cultures contributing their own styles and scripts, from Gothic to Italic, and from Arabic to Chinese.
1. Calligraphy Styles
- Western Calligraphy: Typically focuses on Latin alphabets. Popular styles include Gothic, Italic, and Copperplate.
- Eastern Calligraphy: Includes Chinese, Japanese, and Korean scripts. Each style uses specific brushes and techniques unique to its cultural context.
- Arabic Calligraphy: Characterized by its flowing, curved lines, Arabic calligraphy is often used in religious texts and decorative arts.
Understanding these styles can help you decide which one aligns best with your interests and goals.
2. Essential Tools
To start your calligraphy journey, you’ll need the right tools. Here are the basics:
- Pens and Nibs: Dip pens with pointed nibs are common for traditional calligraphy. There are also brush pens and fountain pens designed specifically for calligraphy.
- Ink: High-quality ink is crucial. You can use bottled ink for dip pens or cartridges for fountain pens.
- Paper: Smooth, bleed-proof paper is ideal. Practice pads are available, but high-quality cotton paper is best for final pieces.
- Guidelines: Printed or hand-drawn guidelines help maintain consistency in letter size and angle.
Getting Started: Foundational Techniques of Calligraphy
Now that you have the right tools, it’s time to dive into practice. The following foundational techniques are crucial for any calligrapher.
1. Mastering Basic Strokes
Calligraphy is all about controlling the pen and mastering basic strokes. These include:
- Downstrokes: Firm, even pressure to create thick lines.
- Upstrokes: Light pressure to produce thin lines.
- Cross Strokes: Used for horizontal lines, requiring consistent pressure.
Practice these strokes individually before moving on to full letters or words.
2. Holding the Pen Correctly
The way you hold your pen can drastically affect your calligraphy. Hold the pen at a 45-degree angle to the paper, with a relaxed grip. Your wrist should glide smoothly across the page, and your movement should come from the arm, not just the fingers.
3. Understanding Letter Anatomy
Each letter in calligraphy is composed of different parts, which include:
- Ascenders: The upward stroke that extends above the median line (e.g., the top of “h”).
- Descenders: The downward stroke that extends below the baseline (e.g., the bottom of “g”).
- Bowls: The round part of a letter (e.g., the body of “d”).
- Serifs: The small lines attached to the end of strokes in certain styles.
Familiarize yourself with these components, as understanding them will help in creating balanced and aesthetically pleasing letters.
Advanced Techniques for Intermediate Calligraphers
Once you’re comfortable with the basics, it’s time to tackle more advanced techniques. These will not only improve your skills but also add depth and personality to your calligraphy.
1. Creating Consistent Letterforms
Consistency is key in calligraphy. Pay attention to:
- Spacing: Letters should be evenly spaced within words, and words should have consistent gaps between them.
- Proportion: Ascenders and descenders should be in proportion to the x-height (the height of lowercase letters like “x”).
- Angle: Maintain a consistent angle for slanted styles, such as Italic.
Use guidelines and practice sheets to help maintain this consistency.
2. Exploring Different Pen Angles
Experimenting with different pen angles can produce various effects. For example:
- A steeper angle (closer to vertical) can create sharper, more angular strokes.
- A flatter angle can give a softer, rounder appearance.
Try different angles to see what best suits your style and the script you are working on.
3. Adding Flourishes
Flourishes are decorative elements that can enhance your calligraphy. However, they should be used sparingly and thoughtfully. Start with simple flourishes, such as extended strokes on the ends of letters, and gradually experiment with more elaborate designs as you gain confidence.
Key tips for flourishes:
- Balance: Ensure flourishes do not overpower the letterforms.
- Symmetry: Especially in more ornate styles, symmetry can add a professional touch.
Developing Your Unique Style of Calligraphy
As you progress, you’ll start developing a unique style. This is one of the most rewarding aspects of calligraphy, as it allows for self-expression and creativity.
1. Experiment with Different Inks and Papers
While black ink on white paper is classic, don’t be afraid to experiment with colored inks, metallics, or different paper textures. These variations can dramatically alter the appearance of your work and help you find a signature look.
2. Mixing Styles
Combining different calligraphy styles can create a unique effect. For example, you might pair a bold Gothic script with delicate Copperplate flourishes. Be mindful of readability when mixing styles.
3. Incorporating Modern Elements
Modern calligraphy often blends traditional techniques with contemporary designs. This might involve using brush pens, playing with non-standard letterforms, or incorporating digital elements. Exploring these modern trends can keep your work fresh and relevant.
Tips for Effective Practice Calligraphy
Like any skill, calligraphy requires consistent practice. Here are some tips to make your practice sessions more effective and enjoyable.
1. Set Clear Goals
Whether it’s mastering a specific script or completing a project, having clear goals can help guide your practice. Break down large goals into smaller, manageable tasks to keep yourself motivated.
2. Practice Regularly
Daily practice, even if only for a few minutes, is more effective than occasional long sessions. This helps build muscle memory and keeps your skills sharp.
3. Use Practice Sheets
Practice sheets with pre-printed guidelines can be very helpful. They allow you to focus on the form of each letter without worrying about consistency or alignment.
4. Analyze Your Work
Regularly reviewing your work is essential for improvement. Look for areas where your strokes may be uneven or where spacing could be improved. Don’t be afraid to critique your work—this is a key part of the learning process.
5. Join a Community
Whether online or in-person, joining a community of calligraphy enthusiasts can be incredibly beneficial. You can share your work, get feedback, and learn from others. There are many forums, social media groups, and workshops dedicated to calligraphy.
Overcoming Common Challenges
Every calligrapher faces challenges, especially in the beginning. Here are some common issues and how to overcome them.
1. Ink Bleeding
If your ink bleeds on the paper, try using a higher-quality paper designed for calligraphy. Some papers absorb ink too quickly, leading to bleeding. Also, make sure your pen nib is clean and free of excess ink.
2. Hand Fatigue
Hand fatigue is common, especially during long practice sessions. Make sure you’re holding the pen correctly and take regular breaks. Stretching your hands and wrists can also help alleviate tension.
3. Inconsistent Strokes
If your strokes are inconsistent, it may be due to uneven pressure or incorrect pen angle. Return to practicing basic strokes and focus on maintaining even pressure throughout each stroke.
4. Lack of Motivation
It’s easy to lose motivation, especially when progress feels slow. To combat this, set small, achievable goals, celebrate your successes, and remind yourself of why you started calligraphy in the first place.
Conclusion: The Journey of Calligraphy
Calligraphy is a journey of continuous learning and creativity. From mastering basic strokes to developing your own unique style, each step is a building block toward becoming a skilled calligrapher. Remember, patience and persistence are your best allies in this journey. With regular practice and a willingness to experiment, you’ll find joy not just in the finished pieces but in the process itself.
Whether you’re writing a heartfelt letter, designing a wedding invitation, or simply practicing for the love of the art, calligraphy is a skill that enriches your life and the lives of those who experience your work. Embrace the challenges, savor the progress, and most importantly, enjoy the beauty of the written word.
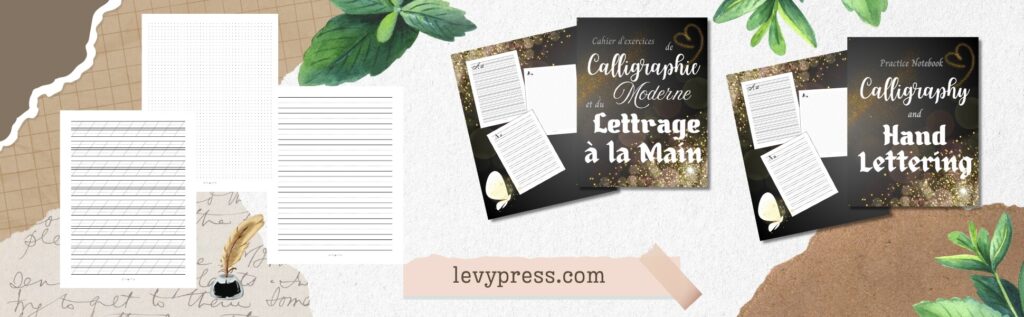
Discover these calligraphy practice notebooks: